Photo: Gemini 3
Introduction
Stone photography plays a central role in the systematic documentation of stone collections, whether in private, scientific, or museum contexts. Stones, minerals, and rocks exhibit an enormous variety of colors, shapes, surface textures, and internal features. High-quality photographic documentation serves not only aesthetic presentation but, above all, accurate identification, comparability, and long-term archiving of the objects. In the digital age, photography is increasingly becoming the most important medium for making collections accessible, reproducible, and understandable.
This article thoroughly covers the theoretical and practical fundamentals of stone photography. It is aimed at both dedicated hobby collectors and professional geologists, mineralogists, curators, and documentation specialists. The goal is to provide a comprehensive understanding of how stones can be photographed accurately, in detail, and consistently.
Importance of Photographic Documentation
A stone collection is more than a collection of beautiful objects. It often represents a systematically organized archive containing information about origin, geological processes, locations, time periods, and chemical composition. Photographs function as visual data carriers, enabling:
- long-term preservation of information
- comparison of individual pieces within a collection
- sharing knowledge with others
- digital publication in databases or catalogs
- support in identification and classification
Good photography can reveal features that are difficult to see with the naked eye, such as fine crystal structures, fracture surfaces, or color nuances. At the same time, it reduces the need to handle delicate or valuable pieces frequently.
Requirements for Stone Photography
Photographic documentation of stones differs significantly from artistic or spontaneous photography. The focus is on objectivity, accuracy, and reproducibility. Key requirements include:
- Color accuracy: The stone’s colors must be reproduced as faithfully as possible.
- Sharpness: Relevant details should be clearly visible.
- Scale: Size and proportions must be understandable.
- Neutrality: The background should not distract from the object.
- Consistency: All objects should be photographed according to similar criteria.
These requirements influence both technical equipment and photographic approach.
Choosing Photographic Equipment
Camera
Stones can generally be photographed with DSLR and mirrorless cameras, high-quality compact cameras, or even smartphones. For professional documentation, however, a camera with the following features is recommended:
- manual controls
- high resolution
- good noise performance
- ability to shoot in RAW format
System and DSLR cameras offer the greatest flexibility, allowing the use of different lenses and precise control over exposure, focus, and white balance.
Lenses
For stone photography, the following lens types are particularly suitable:
- Macro lenses: Ideal for small stones, crystals, and detailed shots.
- Standard lenses: Suitable for medium-sized objects.
- Telephoto lenses: Useful for larger pieces or to avoid distortion.
A true macro lens with a 1:1 reproduction ratio allows even the finest structures to be captured in detail.
Tripod
A stable tripod is almost indispensable. It ensures:
- consistent framing
- maximum sharpness
- reproducible results
- comfortable working with long exposures
Especially with small apertures and low ISO values, longer exposure times are common, which are hardly feasible without a tripod.
Lighting
Natural Light
Daylight can be very even and color-neutral, especially on cloudy days. However, it is difficult to control and varies with time of day, weather, and season. For consistent documentation, natural light is therefore only partially suitable.
Artificial Light
Artificial light sources provide much more control. Suitable options include:
- LED continuous lights with adjustable color temperature
- Studio strobes with softboxes
- Light tents for even illumination
Even, soft lighting is essential to avoid harsh shadows and distracting reflections. Diffuse light is particularly important for shiny or crystalline surfaces.
Light Positioning
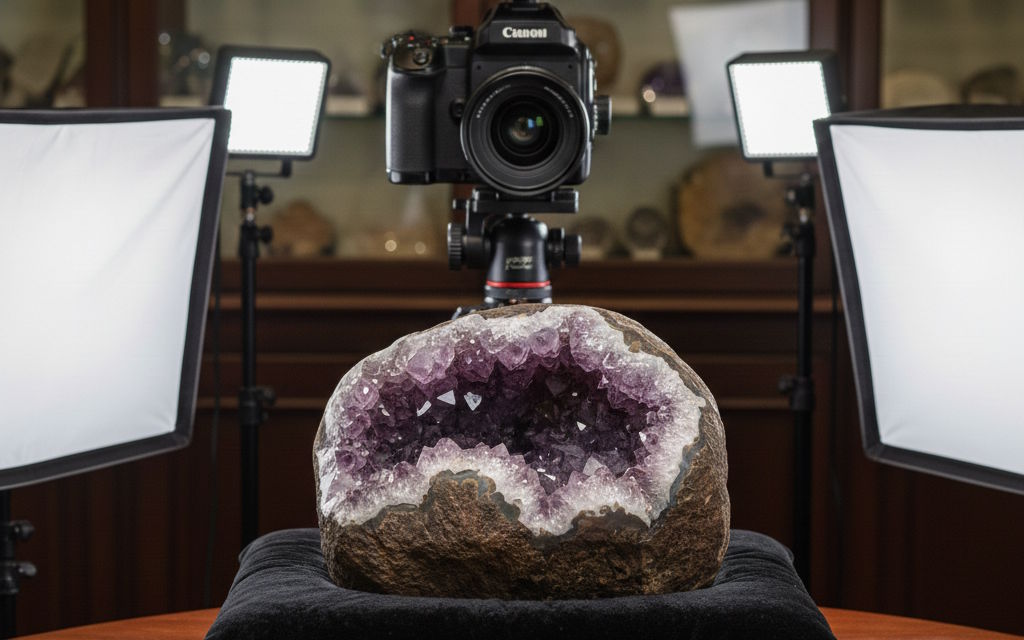
A proven method is to use two to three light sources:
- key light from the front at an angle
- fill light from the opposite side
- optional backlight or background light
This allows the stone’s structure and shape to be represented three-dimensionally without overexposing details.
Background and Surface
The background should be neutral and unobtrusive. Recommended options include:
- solid-colored backgrounds in gray, white, or black
- matte surfaces without texture
- seamless paper or fabric backdrops
Background choice can vary depending on the stone’s color. Light-colored stones stand out better on a dark background, dark stones on a light one.
The surface under the stone should also be non-reflective. Matte acrylic sheets, photo board, or special photo paper work well.
Camera Settings
Aperture
A small aperture (e.g., f/8 to f/16) provides greater depth of field. This is especially important because stones are often three-dimensional and irregularly shaped.
ISO
ISO should be kept as low as possible (ISO 100 or 200) to minimize noise and preserve fine details.
Shutter Speed
Shutter speed depends on the combination of aperture, ISO, and light. A tripod allows longer exposures without problems.
White Balance
Correct white balance is essential for color accuracy. The most reliable method is manual white balance using a gray card or later correction in RAW format.
Perspective and Composition
Standard Views
For systematic documentation, it is advisable to photograph each stone from several standardized perspectives:
- front view
- back view
- side views
- top view
- detail shots
This approach allows comprehensive visual recording of the object.
Scale and Orientation
A scale (e.g., ruler, scale card, or known reference) should be visible in at least one image. Alternatively, size can be recorded in the filename or metadata.
Stone orientation should be consistent, especially for labeled or cataloged pieces.
File Formats and Post-Processing
File Formats
For archiving, shooting in RAW format is recommended. It provides:
- maximum image data
- flexible post-processing
- lossless adjustments
For sharing or publication, JPEG or TIFF versions can also be created.
Post-Processing
Editing should be minimal and documentary. Allowed adjustments include:
- white balance correction
- slight exposure and contrast adjustments
- sharpening
- cropping
Strong color changes, retouching, or removal of natural features are not acceptable.
Metadata and Archiving
Good photographic documentation doesn’t end with the image itself. Accompanying information is equally important:
- location found
- date found
- identification name
- inventory number
- photographer
- date of capture
These data can be stored in a database, spreadsheet, or directly in the image metadata (EXIF/IPTC).
Common Challenges
Reflections
Shiny surfaces and crystals tend to reflect light. Solutions include:
- diffuse light sources
- polarizing filters
- changing light angles
Irregular Shapes
Stones are rarely geometrically regular. Careful alignment and, if necessary, focus stacking help capture all relevant areas sharply.
Color Casts
Incorrect light sources or mixed lighting can cause color casts. Uniform lighting and correct white balance are crucial.
Conclusion
Photography of stones for documenting a stone collection is a demanding but highly rewarding task. It requires technical understanding, care, and a systematic approach. Well-planned photographic documentation significantly enhances the scientific and intrinsic value of a collection and ensures its long-term usability.
With the right equipment, controlled lighting, consistent workflows, and restrained post-processing, stones can be photographed accurately and appealingly. This preserves the collection while making it understandable and accessible for future generations.